Auto body repair is more than just fixing dents and scratches. It’s a meticulous process that restores both the appearance and structural integrity of a vehicle after accidents or damage. Understanding the step-by-step procedure can help car owners feel more confident when entrusting their vehicles to a repair shop.
Step 1: Assessment and Inspection
The process begins with a thorough inspection of the vehicle. Auto body technicians examine:
- The extent of visible damage (dents, scratches, cracks)
- Hidden structural damage (frame misalignment, internal components)
- Safety-related issues (airbags, sensors, and crumple zones)
After the inspection, the shop provides a detailed estimate that outlines the cost, parts needed, and the expected repair timeline.
Step 2: Disassembly
In order to repair the damaged area properly, technicians may remove parts surrounding the damaged area. This could include bumpers, panels, headlights, or interior trim. Disassembly helps them:
- Assess hidden damage
- Prevent further damage during repair
- Ensure precision in the restoration process
Step 3: Damage Repair and Frame Straightening
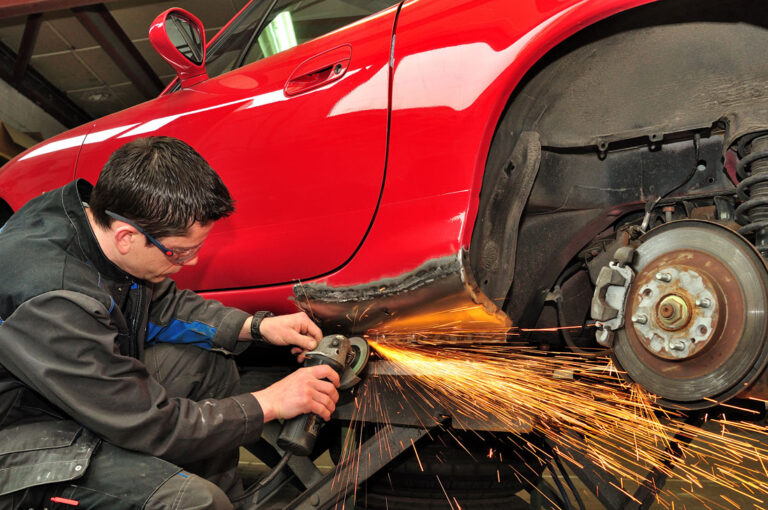
Depending on the type of damage, technicians use various methods to repair dents, scratches, and structural issues:
- Dent removal – Using specialized tools to push or pull out dents.
- Frame straightening – Utilizing frame machines and hydraulic tools for severe collisions.
- Panel replacement – Replacing irreparable panels with new or used parts.
This step ensures the vehicle regains its original shape and structural integrity.
Step 4: Surface Preparation
Before painting, the repaired area must be prepared carefully. This includes:
- Sanding surfaces to smooth out imperfections
- Applying fillers for minor dents or scratches
- Masking areas that do not require painting
Proper surface preparation is essential for a flawless paint finish that matches the rest of the car.
Step 5: Painting
The next step is painting, which restores the vehicle’s exterior appearance:
- Applying primer to protect against rust and enhance paint adhesion
- Painting in layers for even color coverage
- Applying clear coat for a glossy, durable finish
Advanced techniques ensure the new paint blends seamlessly with the original color.
Step 6: Reassembly
Once the paint dries, technicians reassemble all removed parts, such as bumpers, trim, and lights. During this phase, they also:
- Test the functionality of electrical components
- Align panels and doors for proper fit
- Ensure that all safety systems are intact
This step brings the car back to its pre-accident condition.
Step 7: Final Inspection and Quality Check
Before returning the car to the owner, a final inspection is conducted to verify:
- Paint color match and finish quality
- Structural integrity and alignment
- Proper functionality of lights, sensors, and other components
Some shops may also provide a warranty on the repair work for added peace of mind.
Step 8: Detailing and Delivery
The final step is detailing the vehicle, which may include washing, waxing, and interior cleaning. The car is then ready to be returned to the owner, looking as good as new.
Conclusion
Auto body repair is a carefully structured process that combines skill, precision, and technology. From initial assessment to final detailing, each step ensures your vehicle is safe, functional, and visually restored. Understanding the process helps car owners manage expectations and make informed decisions when dealing with vehicle damage.


